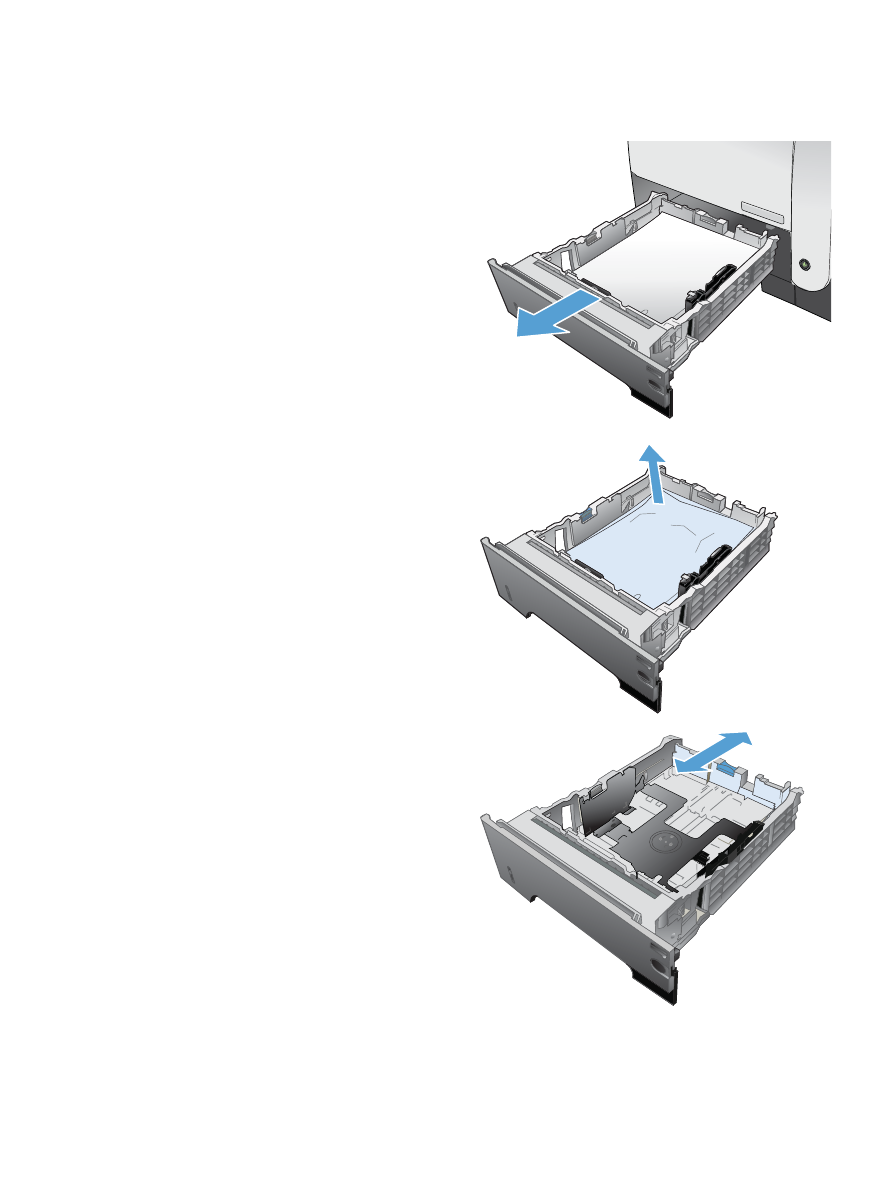
Clear jams in Tray 2 or optional Tray 3
1.
Remove the tray from the product.
2.
Remove the paper from the tray, and discard
any damaged paper.
3.
Verify that the rear paper guide is adjusted to
the indentation for the correct paper size. If
necessary, pinch the release and move the
rear paper guide to the correct position. It
should click into place.
ENWW
Clear jams
173
4.
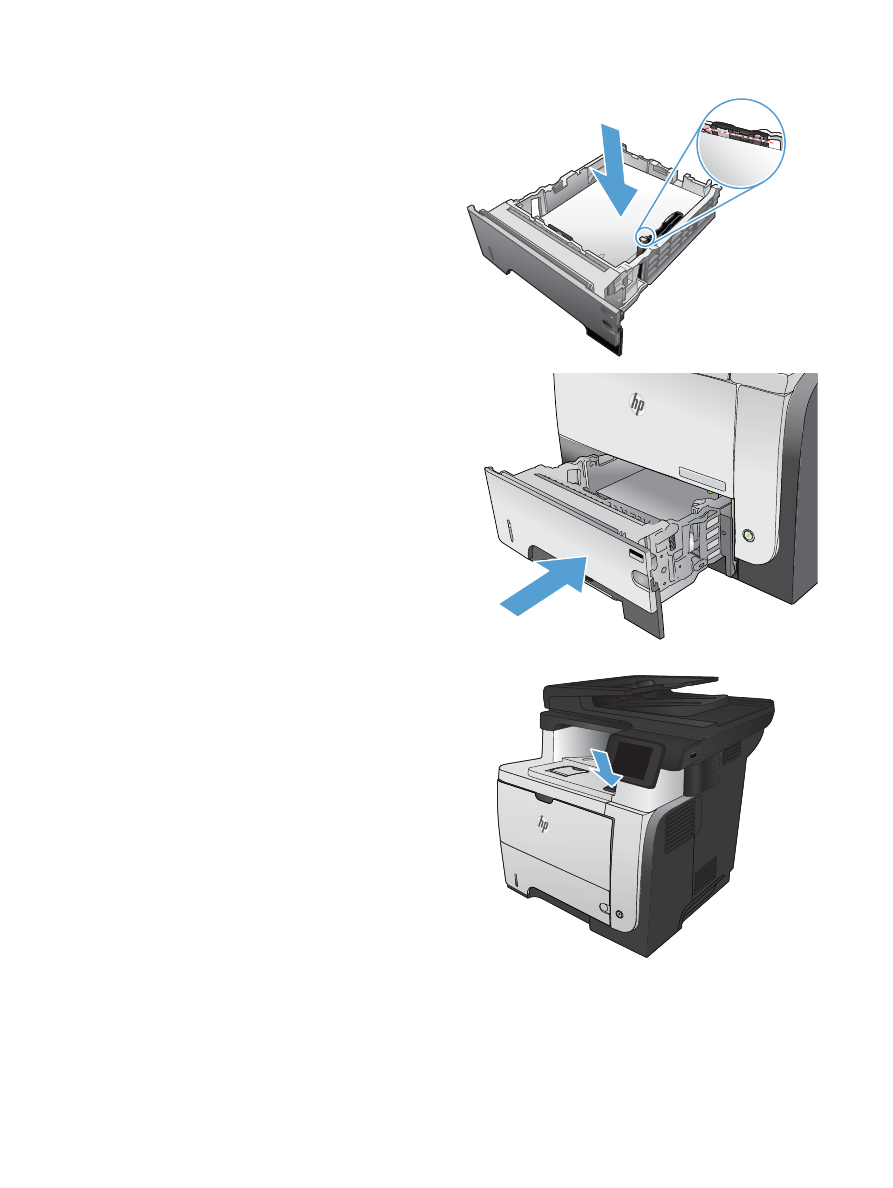
Load the paper into the tray. Make sure that
the stack is flat at all four corners and that the
top of the stack is below the maximum-height
indicators.
5.
Reinsert and close the tray.
2
1
2
2
6.
Press the front-door-release button.
2
174
Chapter 9 Solve problems
ENWW
7.
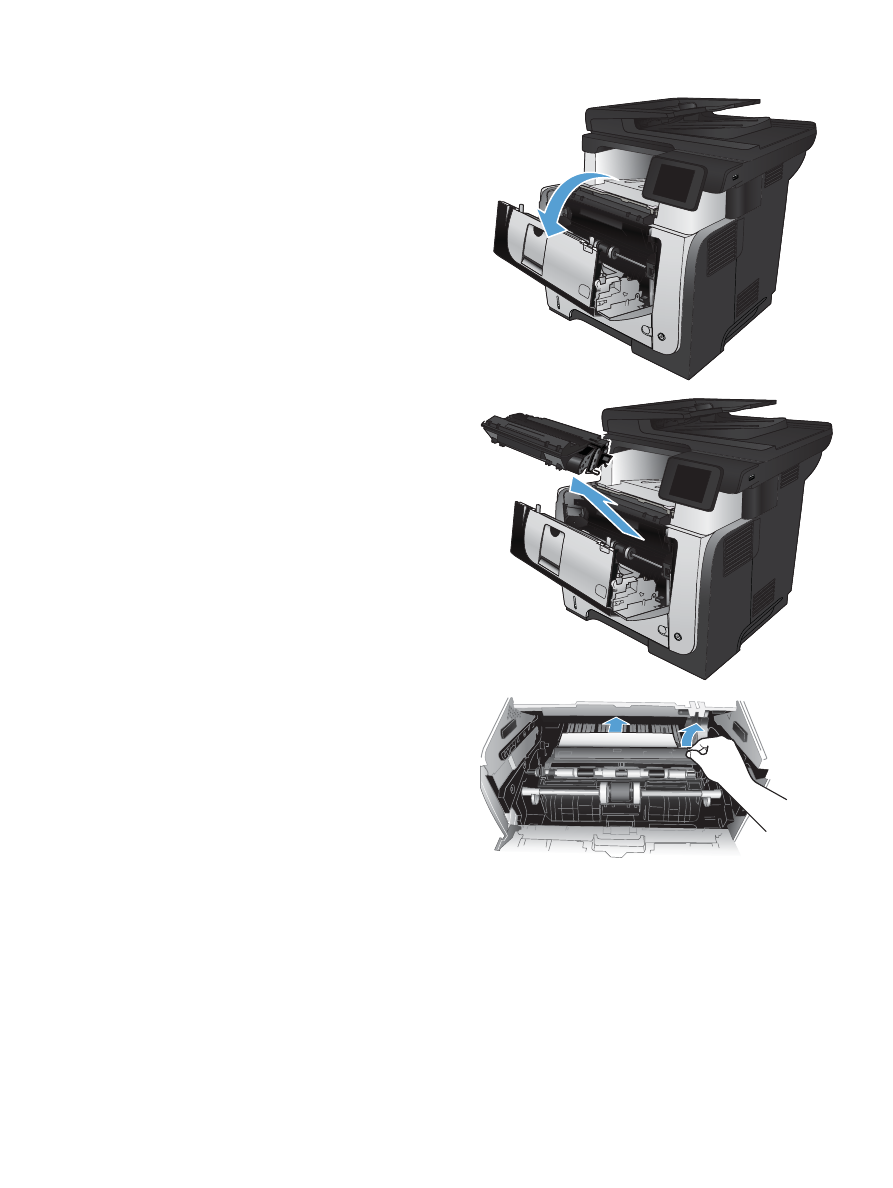
Open the front door.
2
11
8.
Remove the toner cartridge.
2
11
9.
Lift the jam-access covers and remove any
jammed paper.
ENWW
Clear jams
175
10.
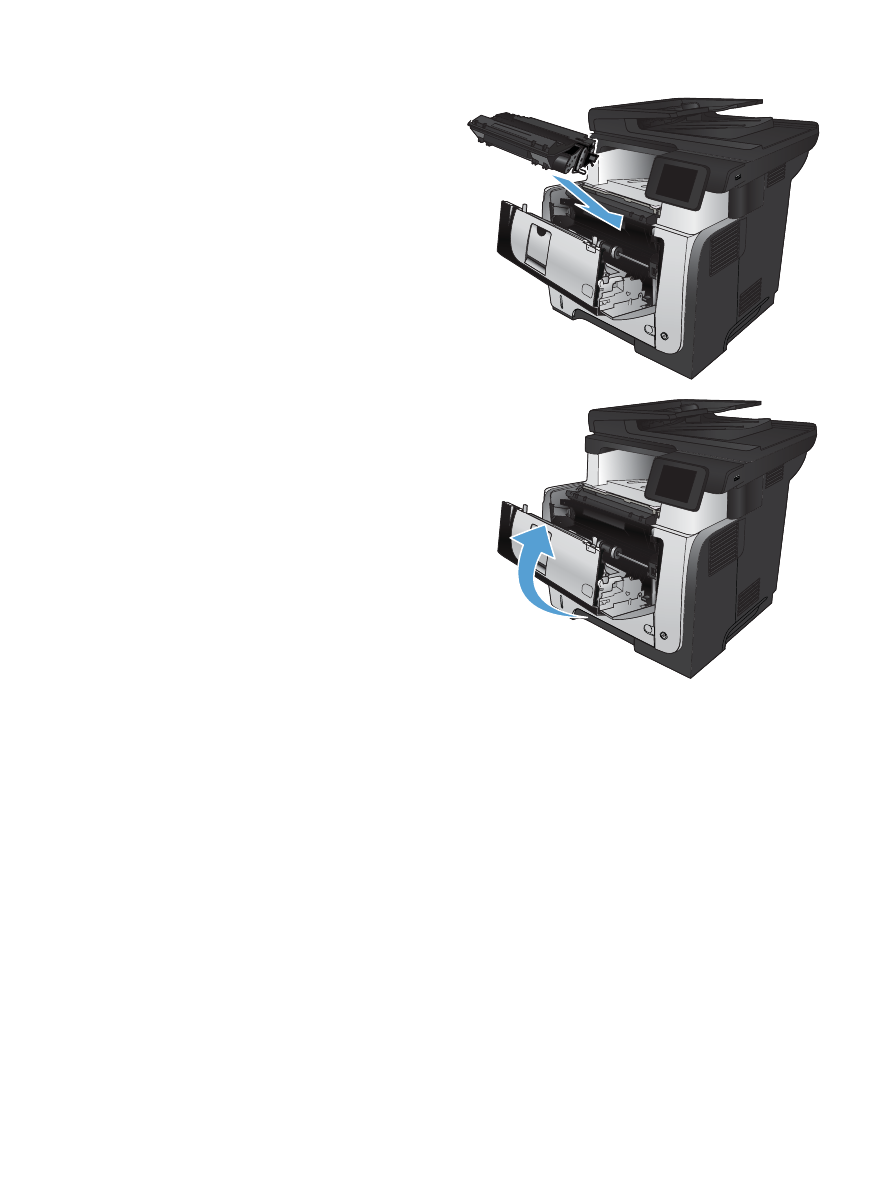
Reinsert the toner cartridge.
2
11
11.
Close the front door.
2
11
176
Chapter 9 Solve problems
ENWW