Manually print on both sides (Windows)
For paper sizes and types that the automatic duplexer does not support, use manual duplex printing. To
use this option, the product must be configured to enable manual duplexing. The first five steps of the
following task need to be performed only one time. After that, you can manually print on both sides by
starting with step 6.
1.
Windows XP, Windows Server 2003,
and Windows Server 2008 (using the
default Start menu view): Click Start,
and then click Printers and Faxes.
Windows XP, Windows Server 2003,
and Windows Server 2008 (using the
Classic Start menu view): Click Start,
click Settings, and then click Printers.
Windows Vista: Click the Windows icon in
the lower-left corner of the screen, click
Control Panel, and then click Printers.
Windows 7: Click the Windows icon in the
lower-left corner of the screen, and then click
Devices and Printers.
2.
Right-click the print-driver icon, and then select
Printer properties.
3.
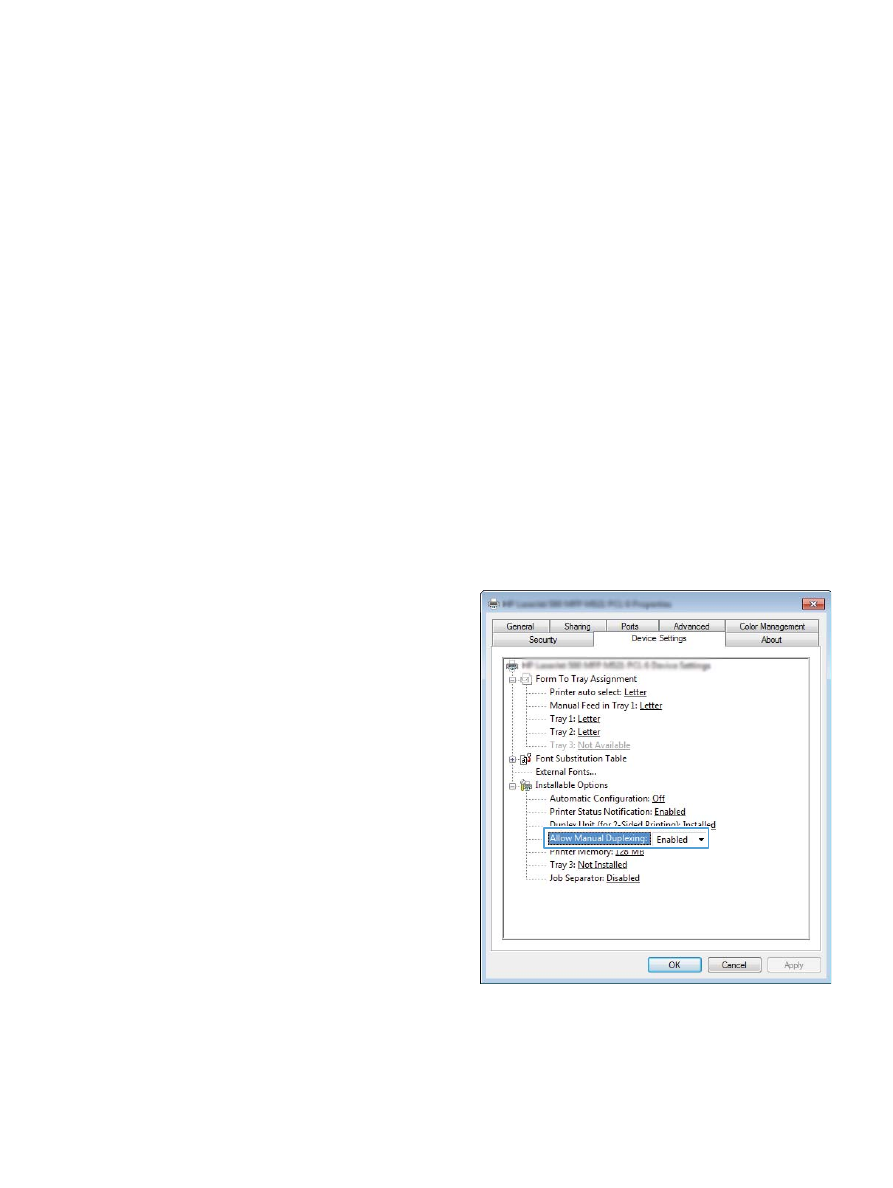
Click the Device Settings tab.
4.
Expand the list of Installable options, and
in the drop-down list next to Allow Manual
Duplexing: select Enabled.
5.
Click the OK button.
ENWW
Print tasks (Windows)
53

6.
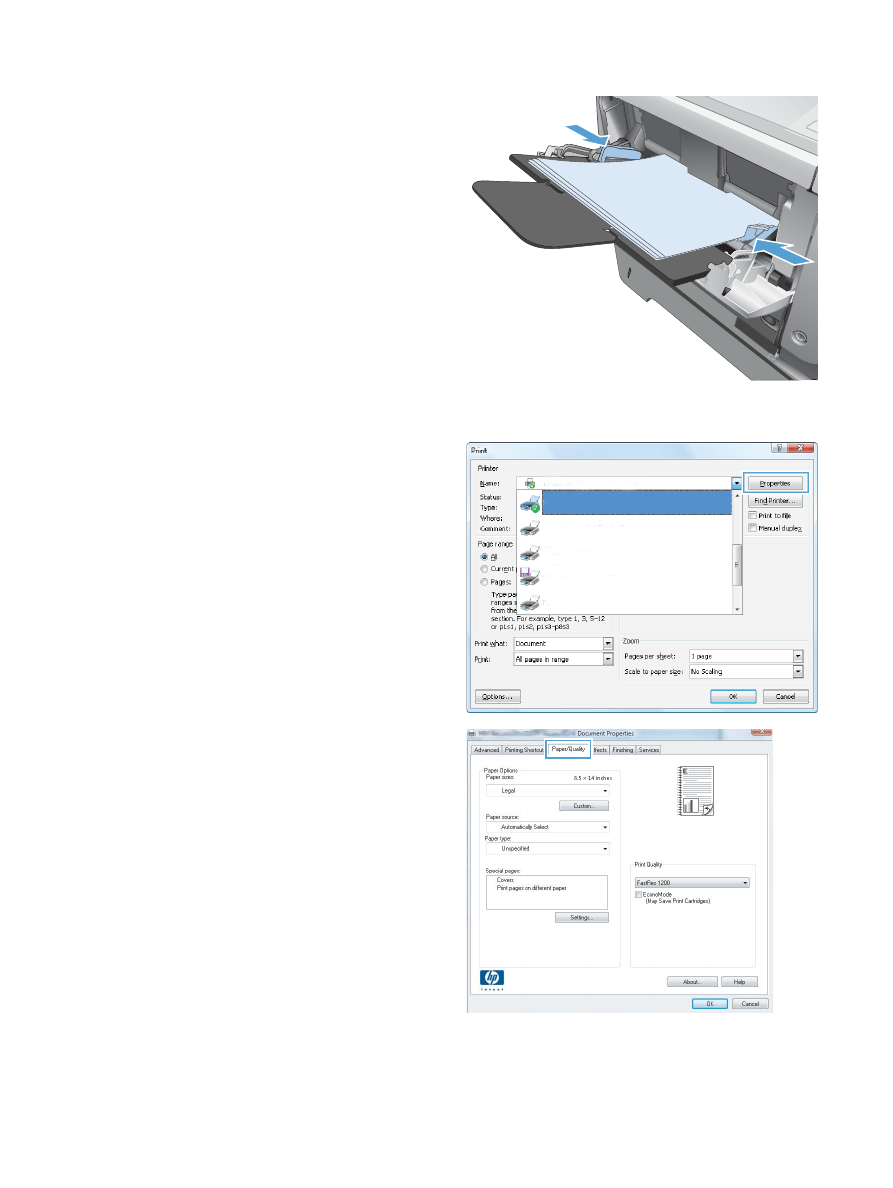
Load Tray 1 with the paper for your document.
7.
From the software program, select the Print
option.
8.
Select the product, and then click the
Properties or Preferences button.
9.
Click the Paper/Quality tab.
54
Chapter 4 Print
ENWW

10.
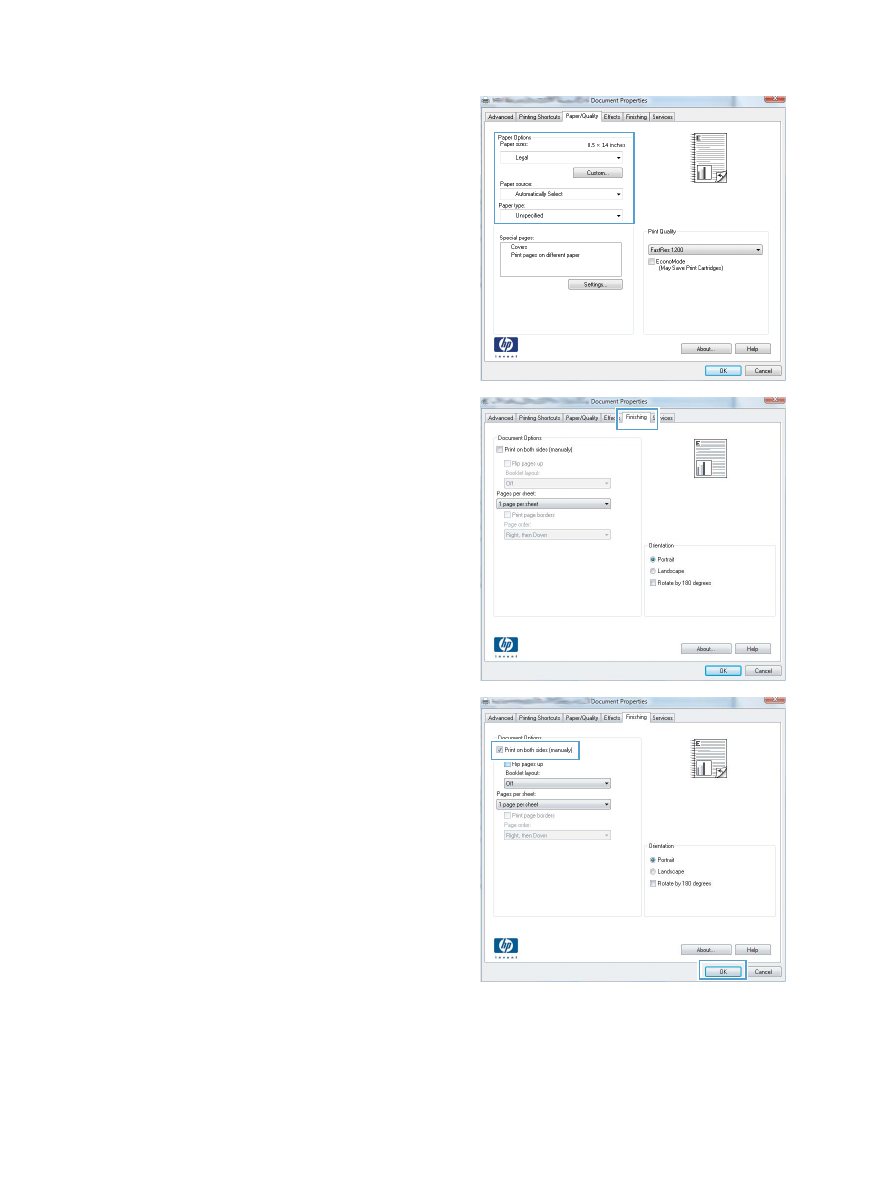
Select the appropriate paper size for your
document, and select the type of paper you
are using. In the Paper source drop-down
list, select the Manual Feed in Tray 1
option.
11.
Click the Finishing tab.
12.
Select the Print on both sides (manually)
check box. Click the OK button to print the
first side of the job.
ENWW
Print tasks (Windows)
55

13.
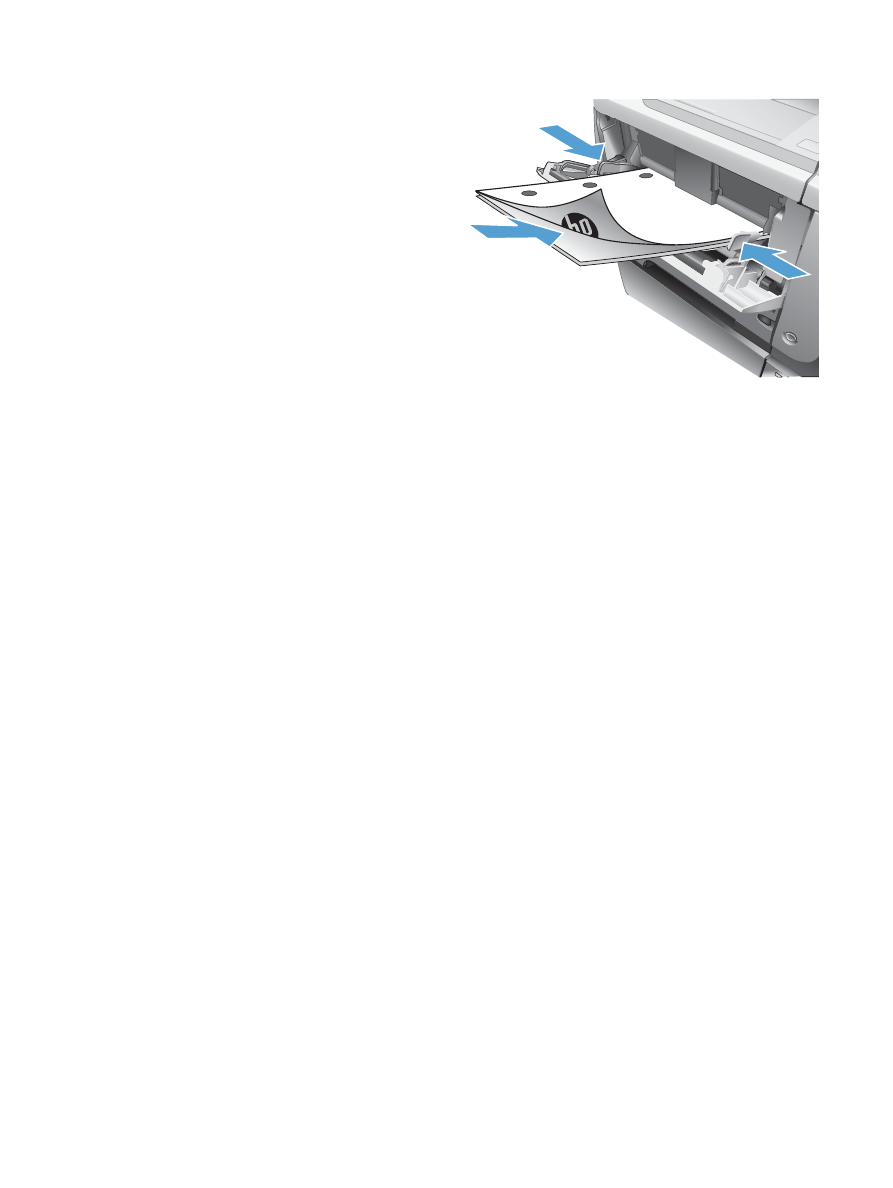
Retrieve the printed stack from the output bin,
and place it with the printed-side facing down
in Tray 1.
NOTE:
Do not rotate or turn over the pages.
14.
If prompted, touch the appropriate control
panel button to continue.
56
Chapter 4 Print
ENWW